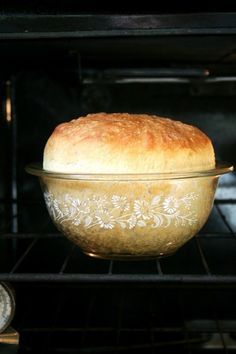
**Instructions**
1. **Combine Dry Ingredients:** In a large mixing bowl, whisk together the flour, yeast, and salt.
2. **Add Water:** Gradually add the warm water to the dry ingredients, stirring with a wooden spoon or a spatula until a shaggy, wet dough forms. Don’t worry about kneading at this stage; just ensure all the flour is incorporated.
3. **First Rise (Bulk Fermentation):** Cover the bowl tightly with plastic wrap or a damp kitchen towel. Let the dough rise at room temperature for 12-18 hours, or until it has more than doubled in size and is very bubbly. The longer it rises, the more flavor it will develop.
4. **Prepare for Baking:** About 30 minutes before you’re ready to bake, preheat your oven to 450°F (232°C). Place a 6-8 quart Dutch oven (with its lid) inside the oven to preheat as well.
5. **Shape the Dough:** Lightly flour a clean work surface. Gently scrape the risen dough out of the bowl onto the floured surface. Using floured hands, gently fold the edges of the dough towards the center a few times to create a somewhat roundish shape. Do not overwork the dough; handle it as little as possible to maintain its airy texture.
6. **Second Rise (Optional, but Recommended):** Carefully transfer the shaped dough to a piece of parchment paper. If desired, you can let it rest for another 15-20 minutes while the Dutch oven preheats, or go straight to baking.
7. **Bake:** Carefully remove the hot Dutch oven from the oven. Using the parchment paper, gently lower the dough into the Dutch oven. Score the top of the loaf with a sharp knife or bread lame (optional, but creates a nice aesthetic).
8. **Covered Bake:** Place the lid back on the Dutch oven and bake for 30 minutes.
9. **Uncovered Bake:** Remove the lid and continue baking for another 15-20 minutes, or until the crust is deeply golden brown and the internal temperature reaches 200-210°F (93-99°C).
10. **Cool:** Carefully remove the bread from the Dutch oven and transfer it to a wire rack to cool completely before slicing. This is crucial for the internal crumb to set properly.
**Short Tips**
* **Don’t over-flour:** A sticky dough is a happy dough for this recipe. Resist the urge to add too much extra flour.
* **Longer rise, better flavor:** The long, slow rise is what develops incredible flavor in this bread. Don’t rush it!
* **Dutch oven is key:** Baking in a preheated Dutch oven creates a steamy environment that mimics a professional bread oven, resulting in that perfect crust.
* **Listen for the thump:** A properly baked loaf will sound hollow when tapped on the bottom.
* **Cool completely:** Resist the temptation to slice into warm bread. Letting it cool ensures a better texture and prevents a gummy crumb.
