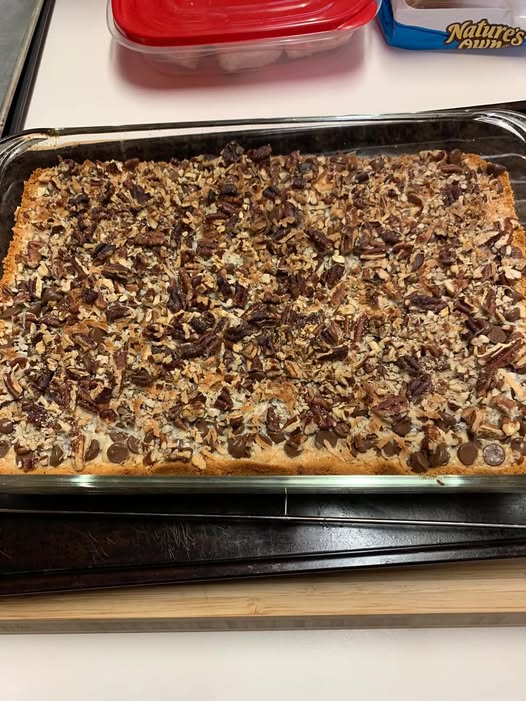
These Magic Cookie Bars are a nostalgic favorite! With layers of buttery graham cracker crumbs, creamy sweetened condensed milk, chocolate chips, shredded coconut, and crunchy pecans, they come together effortlessly for a sweet and decadent treat. Perfect for parties, potlucks, or satisfying your dessert cravings!
Ingredients
- 2 sticks (1 cup) unsalted butter, melted
- 1 1/2 cups graham cracker crumbs
- 1 (14-ounce) can sweetened condensed milk
- 1 bag (12 ounces) semi-sweet chocolate chips
- 1 1/3 cups flaked coconut
- 2 cups chopped pecans
Instructions
Step 1: Preheat the Oven
- Preheat your oven to 350°F (175°C).
Step 2: Melt the Butter
- Place the 2 sticks of butter directly into a 9×13-inch baking pan.
- Put the pan in the oven for a couple of minutes until the butter has fully melted.
- Once melted, carefully remove the pan from the oven.
Step 3: Add the Graham Cracker Layer
- Sprinkle the graham cracker crumbs evenly over the melted butter in the pan.
- Use the back of a spoon or your hands to pat the crumbs down gently to form a solid crust layer.
Step 4: Drizzle the Condensed Milk
- Drizzle the sweetened condensed milk evenly over the graham cracker crust.
- Spread it carefully, ensuring full coverage. This will act as the “glue” for all the toppings.
Step 5: Layer the Ingredients
- Chocolate Chips: Evenly sprinkle the entire bag of semi-sweet chocolate chips over the condensed milk.
- Coconut: Add the flaked coconut, spreading it evenly for a sweet, chewy layer.
- Pecans: Top everything with the chopped pecans, pressing them down gently into the coconut and chocolate layer to ensure they stick.
Step 6: Bake
- Place the pan into the preheated oven and bake for 25 minutes, or until the edges are golden brown and the top is slightly toasted.
- Be careful not to overbake to keep the bars gooey and rich!
Step 7: Cool and Cut
- Remove the pan from the oven and allow the bars to cool completely before cutting into squares.
- Cooling ensures the layers set properly and makes for easier slicing.
- Once cooled, use a sharp knife to cut the bars into your desired size.
Tips for Success
- Even Layers: Make sure to spread each layer evenly for consistent bites of chocolate, coconut, and pecans.
- Press the Crust: Firmly pat the graham cracker crumbs into the butter so they hold together as the base.
- Line the Pan: For easy cleanup and removal, line the baking pan with parchment paper or foil, leaving some overhang to lift the bars out.
- Cooling Time: Don’t skip the cooling step! Warm bars will crumble when cut.
Storage Instructions
- Room Temperature: Store the bars in an airtight container at room temperature for up to 5 days.
- Refrigerate: Keep them in the fridge for a firmer texture; they’ll last for about 1 week.
- Freeze: For longer storage, wrap individual bars tightly in plastic wrap, place in a freezer-safe container, and freeze for up to 3 months. Thaw at room temperature before enjoying.
Why You’ll Love These Magic Cookie Bars
- Simple Ingredients: Only 6 pantry-friendly ingredients!
- Easy to Make: Minimal prep time with no mixing bowls required.
- Rich and Decadent: Layers of chocolate, sweet coconut, and crunchy pecans make every bite indulgent.
- Perfect for Any Occasion: Great for parties, bake sales, holidays, or as a quick dessert fix.
Nutrition (Per Bar)
- Calories: ~250 kcal
- Fat: ~15g
- Carbs: ~28g
- Sugar: ~18g
- Protein: ~3g
Note: Nutrition values are approximate and may vary based on serving size and specific ingredients used.
Conclusion
These Magic Cookie Bars are an all-time classic that’s loved by kids and adults alike. With their rich, layered flavors and simple prep, they’re the perfect treat for any occasion. Whether you’re making them for a bake sale, a holiday dessert platter, or just a sweet craving, they’re sure to disappear quickly!
Enjoyed this recipe? Don’t forget to share it and pin it for later! 🍫🥥✨
