Instructions
1. **Prepare the Dough:** In a large bowl, combine the all-purpose flour and salt. Add the vegetable oil and mix with your fingertips until the mixture resembles coarse crumbs.
2. **Add Water Gradually:** Slowly add the warm water, a little at a time, mixing until a shaggy dough forms. You might not need all the water, or you might need a tiny bit more – the goal is a soft, pliable dough.
3. **Knead the Dough:** Turn the dough out onto a lightly floured surface and knead for 5-7 minutes until it’s smooth and elastic. It should spring back when gently poked.
4. **Rest the Dough:** Place the dough back in the bowl, cover it with a damp cloth or plastic wrap, and let it rest for at least 30 minutes at room temperature. This allows the gluten to relax, making the dough easier to roll.
5. **Divide the Dough:** After resting, divide the dough into 8-10 equal portions. Roll each portion into a smooth ball.
6. **Forming Wrappers (The Samosa/Spring Roll Method):**
* Lightly oil your work surface.
* Take one dough ball and flatten it into a rough disc. Brush a thin layer of vegetable oil on one side of the disc.
* Sprinkle a little cornstarch over the oiled surface.
* Take another dough ball, flatten it, and place it on top of the first oiled and dusted disc. Repeat for 2-3 layers (e.g., stack 2 or 3 discs together). This creates individual wrappers after cooking.
* Gently press the stacked discs together.
* Roll out the stacked discs into a very thin circular or rectangular shape, about 8-10 inches in diameter or length. The thinner, the better, but be careful not to tear them.
7. **Cook the Wrappers:**
* Heat a non-stick pan or griddle over medium-low heat. Do not oil the pan.
* Carefully place the rolled-out stacked dough onto the hot pan.
* Cook for about 30 seconds to 1 minute per side, or until you see small bubbles forming and the dough looks slightly dry. The wrappers should not brown significantly.
* Flip and cook for another 30 seconds to 1 minute on the other side.
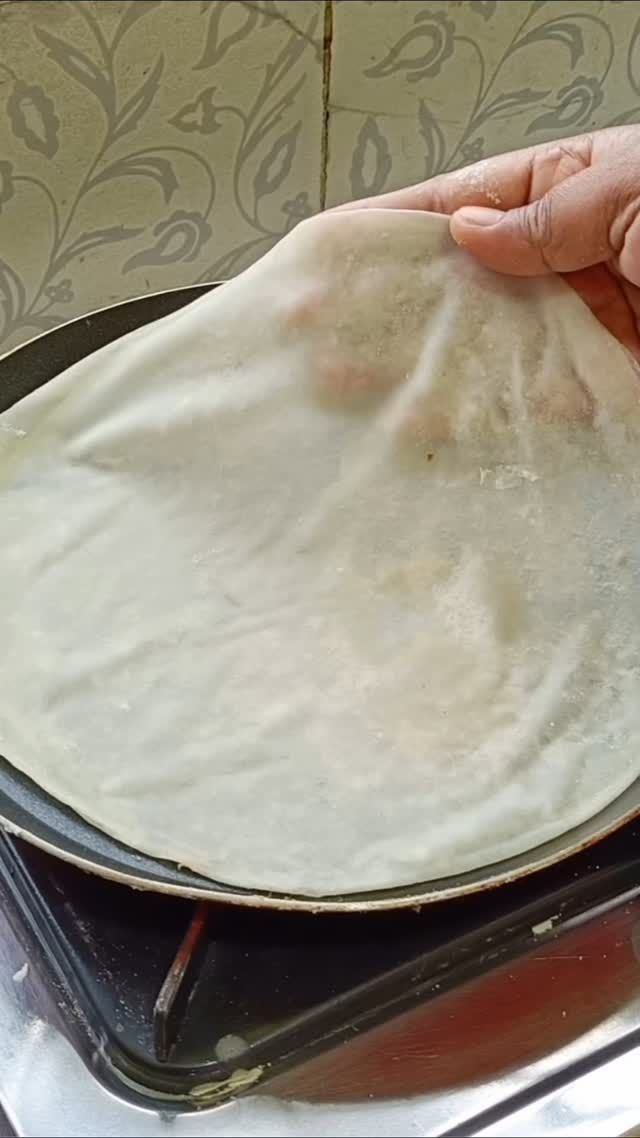
8. **Separate the Wrappers:** Immediately after cooking, transfer the stacked wrappers to a clean surface. While still warm, carefully peel apart each layer. You’ll now have individual, thin wrappers!
9. **Trim (Optional):** If desired, trim the edges of the wrappers to create perfect squares or circles for your samosas or spring rolls.
10. **Store:** Stack the freshly made wrappers with parchment paper in between, then store them in an airtight bag or container. They can be kept in the refrigerator for up to 3 days or frozen for up to 2 months.
Short Tips
* **Consistency is Key:** The amount of water might vary slightly depending on your flour and humidity. Aim for a soft, slightly sticky dough that becomes smooth after kneading.
* **Don’t Overcook:** The wrappers should remain pale and pliable. Overcooking will make them brittle.
* **Keep Dough Covered:** While working, always keep the dough balls you’re not using covered with a damp cloth to prevent them from drying out.
* **Cornstarch for Separation:** Don’t skip the cornstarch between the layers! It’s crucial for easy separation after cooking.
* **Experiment with Thickness:** For spring rolls, aim for very thin wrappers. For samosas, you might prefer them slightly thicker to hold heartier fillings.
* **Double the Batch:** These wrappers freeze beautifully, so consider making a larger batch to save time later.
