Step-by-Step Guide to Making Fluffy Homemade Bread
1. Activate the Yeast
In a small bowl, combine 1½ cups warm water, 2 tbsp sugar, and 2¼ tsp active dry yeast. Stir gently and let it sit for 5-10 minutes until it becomes frothy. This step is crucial—if your yeast doesn’t foam, it may be inactive, and you’ll need to start over with fresh yeast.
Tip: The water should be warm but not hot. Aim for around 110°F (43°C) to properly activate the yeast.
2. Make the Dough
In a large mixing bowl, combine 4 cups all-purpose flour and 1½ tsp salt.
Pour in the frothy yeast mixture along with 2 tbsp olive oil or melted butter. Stir everything together until a rough dough forms.
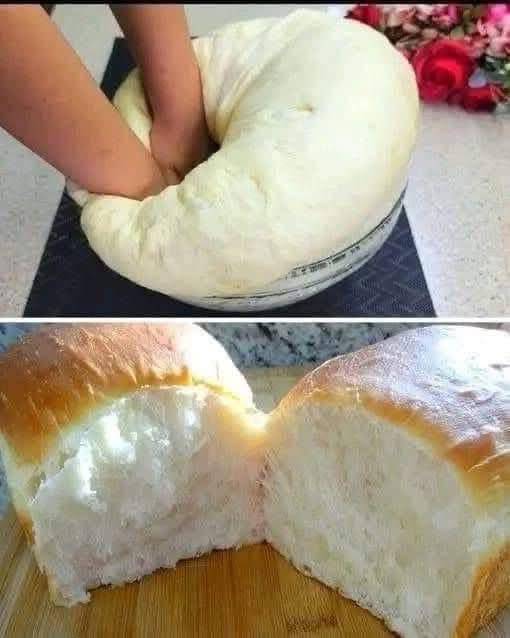
Turn the dough out onto a lightly floured surface and knead for 8-10 minutes until it becomes smooth and elastic. Alternatively, use a stand mixer with a dough hook attachment for a hands-off approach.
Tip: If the dough feels too sticky, add a little flour, a tablespoon at a time. If it’s too dry, add a splash of water.
3. First Rise (Let the Dough Double)
Place your dough in a lightly greased bowl and cover it with a clean kitchen towel or plastic wrap. Let it rise in a warm, draft-free spot for 1 to 1.5 hours, or until it has doubled in size.
Pro Tip: If your kitchen is chilly, preheat your oven to 200°F (93°C) for 5 minutes, then turn it off and place the dough inside with the door slightly ajar.
4. Shape the Dough
Once the dough has doubled in size, punch it down gently to release any air bubbles.
Turn it out onto a lightly floured surface, shape it into a loaf, and place it in a greased 9×5-inch loaf pan.
5. Second Rise (Final Proofing)
Cover the loaf pan with a towel and let the dough rise again for 30-45 minutes, or until it rises just above the rim of the pan.
This second rise ensures a light, fluffy texture and a beautiful shape.
6. Bake the Bread
Preheat your oven to 375°F (190°C).
Bake the loaf for 25-30 minutes, or until the top is golden brown and the loaf sounds hollow when tapped. If the top is browning too quickly, loosely cover it with aluminum foil for the remainder of the baking time.
7. Cool and Serve
Remove the bread from the oven and let it cool in the pan for 5 minutes. Transfer it to a wire rack to cool completely before slicing.
Resist the temptation to cut into the bread too soon! Cooling allows the crumb to set properly, giving you that perfect, fluffy texture.
Serving Suggestions
This fluffy homemade bread is incredibly versatile. Here are some of our favorite ways to enjoy it:
- Fresh with Butter: Nothing beats warm bread with a pat of salted butter.
- Toast with Jam: Perfect for a simple, comforting breakfast.
- Sandwich Bread: Soft and sturdy enough for your favorite fillings.
- French Toast: Transform leftover slices into a decadent breakfast treat.
Tips for Perfect Homemade Bread Every Time
- Measure Your Flour Correctly: Spoon the flour into your measuring cup and level it off with a knife for accurate measurement.
- Check Your Yeast: Always ensure your yeast is fresh and active for the best rise.
- Use the Windowpane Test: To check if your dough is kneaded enough, stretch a small piece. If it forms a thin, translucent membrane without tearing, it’s ready!
- Store Properly: Keep your bread in an airtight container or bread box at room temperature. It’s best enjoyed within 2-3 days, but you can freeze slices for later use.
Troubleshooting Common Bread Issues
- Bread Didn’t Rise: Check the yeast expiration date and ensure your water was the right temperature.
- Dense Texture: This can happen if the dough wasn’t kneaded enough or didn’t rise properly.
- Crust Too Hard: Cover the loaf with foil during baking if it browns too quickly.
Frequently Asked Questions (FAQ)
Can I use whole wheat flour instead of all-purpose flour?
Yes! Substitute up to 50% of the all-purpose flour with whole wheat flour. Keep in mind that whole wheat flour may make the bread denser.
How do I store leftover bread?
Store at room temperature in an airtight container for up to 3 days. For longer storage, slice the bread and freeze it.
Can I make this bread without a stand mixer?
Absolutely! This recipe is designed to be made by hand, but a stand mixer with a dough hook makes the process even easier.
Final Thoughts: Your New Favorite Homemade Bread Recipe
Baking bread at home is not just about the delicious end result—it’s a rewarding experience that brings warmth and joy to your kitchen. This fluffy homemade bread recipe is perfect for beginners and seasoned bakers alike. It’s soft, versatile, and bound to become a staple in your household.
Once you try this recipe, you’ll see why homemade bread is better than anything you can buy at the store. So, roll up your sleeves, grab your ingredients, and let’s get baking! Your taste buds will thank you.
