Step-by-Step Instructions
Step 1: Mix the Dry Ingredients
In a large mixing bowl, combine the bread flour, instant yeast, salt, and sugar. Whisk them together to ensure even distribution.
Step 2: Add the Wet Ingredients
Create a well in the center of the dry ingredients and pour in the warm water and olive oil. Mix everything together using a wooden spoon or your hands until a shaggy dough forms.
Step 3: Knead the Dough
Turn the dough out onto a lightly floured surface and knead for 8–10 minutes. If the dough feels too sticky, add a little more flour, but be careful not to overdo it. You’re aiming for a smooth, elastic dough that springs back when poked.
Step 4: First Rise
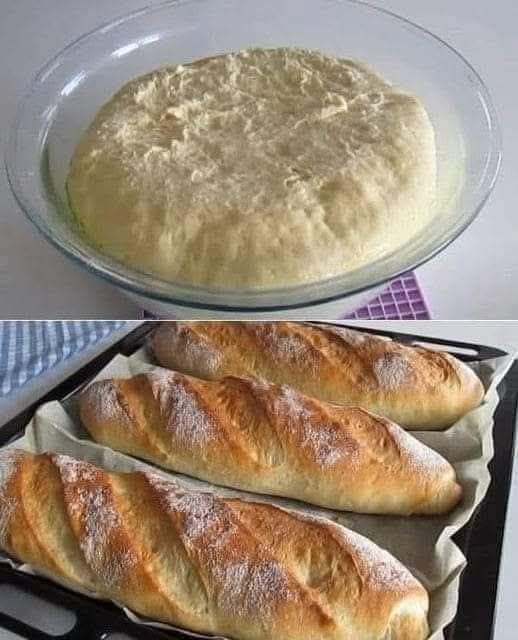
Place the dough in a lightly oiled bowl and cover it with a damp kitchen towel or plastic wrap. Let it rise in a warm, draft-free spot for about 1 hour, or until it has doubled in size.
Step 5: Shape the Loaf
Once the dough has risen, gently punch it down to release any air bubbles. Shape it into a loaf by folding the edges toward the center and rolling it tightly. Place the shaped dough into a greased loaf pan.
Step 6: Second Rise
Cover the loaf pan with a towel and let the dough rise again for 30 minutes. This second rise ensures a light and airy texture.
Step 7: Bake to Perfection
Preheat your oven to 375°F (190°C). Bake the bread for 35 minutes, or until the top is golden brown and the loaf sounds hollow when tapped on the bottom.
Step 8: Cool and Enjoy
Remove the bread from the oven and let it cool in the pan for 10 minutes. Then transfer it to a wire rack to cool completely before slicing.
Tips for Success
- Use a Kitchen Scale: For the most accurate results, weigh your ingredients.
- Experiment with Flavors: Add herbs, garlic, cheese, or seeds to customize your loaf.
- Store Properly: Keep your bread in an airtight container or bag at room temperature for up to 3 days. For longer storage, freeze slices and toast them as needed.
Frequently Asked Questions
1. Can I use all-purpose flour instead of bread flour?
Yes, but the texture will be slightly less chewy. Bread flour is ideal for its higher protein content.
2. What if I don’t have instant yeast?
You can use active dry yeast, but you’ll need to proof it in warm water with a pinch of sugar before adding it to the flour.
3. How do I know when the bread is done baking?
Use a food thermometer to check the internal temperature—it should read 190–200°F (88–93°C).
4. Can I make this recipe gluten-free?
This recipe is designed for wheat flour, but you can experiment with gluten-free flour blends. Keep in mind the texture will differ.
Final Thoughts
Baking bread at home is a skill that’s both practical and deeply satisfying. With this simple recipe, you’ll be able to create a loaf that’s far superior to anything you can buy at the store. So roll up your sleeves, gather your ingredients, and get ready to enjoy the warm, comforting aroma of homemade bread.
Welcome to your new bread-baking journey! 🌟
